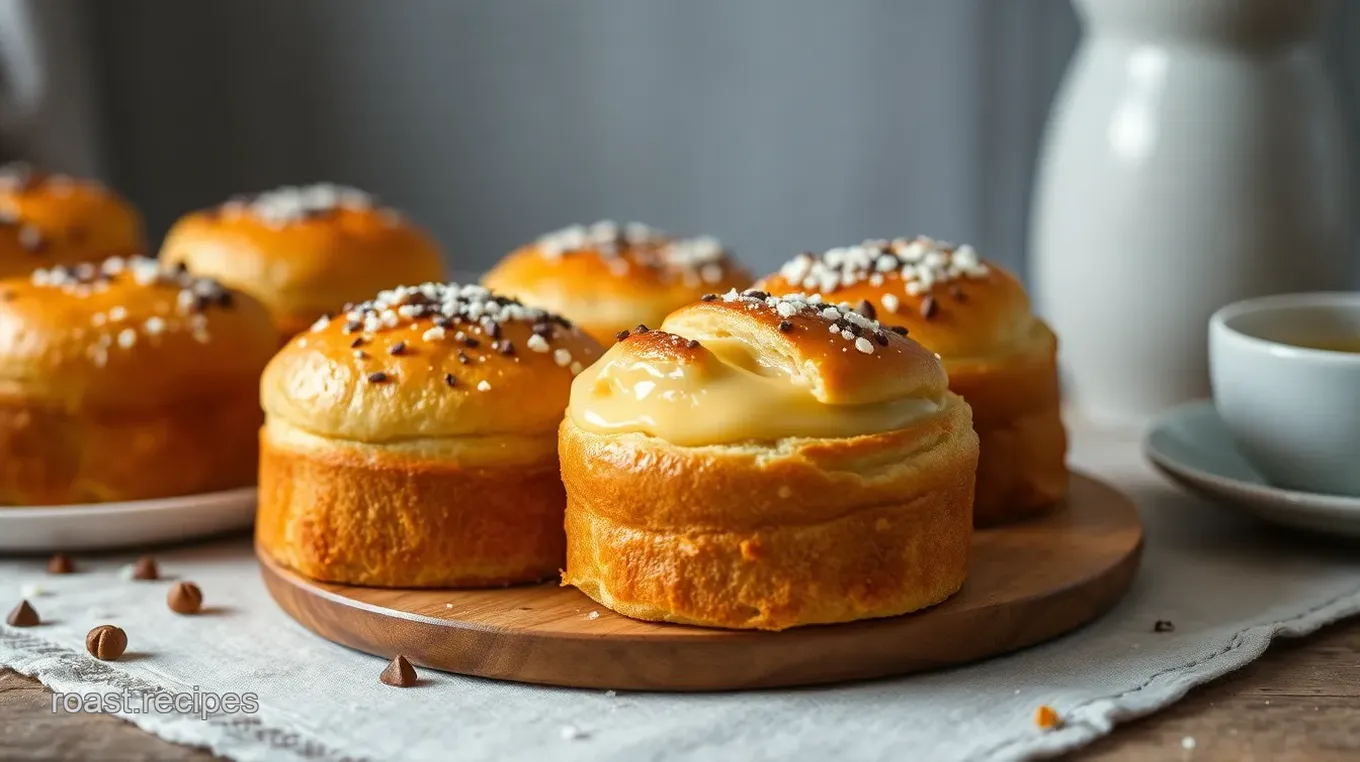
Bake Norwegian School Buns with Custard Filling
Looking for a delightful treat? Let me share my cherished recipe to bake Norwegian School Buns with custard filling—warm, sweet, and oh so comforting!

Discover the Joy of Baking Norwegian School Buns with Custard Filling
Oh my gosh, have you ever found yourself standing in front of the oven, just waiting for something delicious to bake? i remember the first time i made norwegian school buns with custard filling .
The dough was rising, and i was practically dancing around my kitchen, excitement bubbling just like the yeast in my bowl! honestly, there’s something magical about baking, especially when you’re creating something with such rich tradition.
So, let’s dive in!
A Little Taste of History
These sweet treats, known as skoleboller , have their roots deep in norway's cultural baking traditions . they’re not just any buns; they reflect a sense of comfort and nostalgia.
Traditionally served as a treat for kids after school, these custard-filled buns have become a staple in norwegian homes, making them a beloved choice for afternoon tea treats all over the world.
As scandinavian baking becomes more popular, people everywhere are discovering how to make skoleboller, and trust me – you’re going to want to grab this easy bun recipe!
When it comes to making these delicious soft rolls, you don't have to be a pro baker. with about 1 hour and 45 minutes from start to finish (including rising time), even beginner bakers can whip up a batch of these heavenly treats.
Just keep your patience at the ready, because waiting for the dough to rise can feel like watching paint dry!
Why You'll Love This Recipe
Baking is not just about the food; it’s about the joy and warmth it brings. these custard-filled buns pack a punch when it comes to flavor and texture.
Here’s what makes them so special:
-
Healthier indulgence : unlike many traditional norwegian desserts , these buns can be made with some healthier swaps. by using whole milk and natural sugars, you get a treat that feels good to eat.
-
Perfect for celebrations : whether you’re hosting a brunch or a holiday gathering, these buns bring that cozy vibe. imagine serving them warm to your friends while watching a holiday movie together.
Seriously, it gets no better!
-
Unique Flavor Combinations : You can play around with fillings! They’re a blank canvas for your creativity. Fancy chocolate custard or berry filling? Go for it!
-
Family-Friendly Fun : It’s a blast to get your kids involved, mixing dough, and shaping buns. Trust me, nothing brings family together like some baking tips and tricks , especially when there’s custard involved!
Time to Gather the Goodies
Ready to roll up your sleeves? before we jump into the ingredient list, remember this is a forgiving recipe. baking with yeast takes some practice, but once you get it down, it’s so satisfying.
Just think of all the cozy breakfasts and sweet treats you can create! so, let's peek at what you need to bake norwegian school buns with custard filling .
..
These are such romantic little pastries—perfect for a cozy sunday at home or any special occasion. not to mention, they draw sweet nostalgia, reminding me of snowy afternoons spent drinking hot cocoa and sharing stories with family.
Are you excited yet? I sure am! Let’s get our kitchen ready and fill those buns with the glorious custard that’s just waiting to be savored! Get ready to sprinkle some goodness into your day—it’s going to be a treat!

Essential Ingredients Guide for Baking Delicious School Buns
When diving into baking Norwegian School Buns with Custard Filling , one can’t overlook the importance of quality ingredients. The best recipes begin with the right elements. So let's unpack the essentials!
Premium Core Components
First off, measurements matter . For our sweet rolls recipe, you'll need:
- 4 cups (500g) all-purpose flour
- 1/2 cup (100g) granulated sugar
- 2 teaspoons active dry yeast
- And don’t forget about the 1 cup (240ml) whole milk, warmed up!
Quality indicators are crucial too. look for flour that feels soft and is finely milled. your sugar should be pure white and free from lumps.
When it comes to yeast, make sure it's active and hasn’t expired.
Now, let’s talk storage guidelines . flour should be kept in a cool, dry place and sealed tightly. sugar? just keep it in its bag or a tight container.
Yeast? store that in the fridge! and generally, if you choose the right ingredients, you can expect a shelf life of up to 2 years for flour, a year for sugar, and around 6 months for yeast .
To nail down those freshness tips , always check the expiration date. if your yeast doesn’t bubble when activated, it’s time to toss it.
And always go for room temperature eggs – that makes a soft dough recipe true magic!
Signature Seasoning Blend
Flavor is where the fun begins! for our school buns, think about essential spice combinations . that could mean adding a pinch of cardamom or nutmeg to your dough for warmth and depth.
When it comes to herb selections , this isn’t exactly a savory dish, but a little hint of vanilla can elevate your custard filling.
Pairing flavors is key; they should dance together but not clash.
Aromatics , like freshly grated nutmeg, can amplify those flavors. and hey, don’t be afraid to play around! every baker can have their own spin.
Maybe you want a twist of lemon zest or even some cocoa in your custard? go wild!
Smart Substitutions
Let’s be real: baking doesn’t always go as planned! having a list of common alternatives can save the day. out of milk? almond milk works too! for egg wash, use an aquafaba mix (chickpea water).
Need gluten-free? swap your flour with a 1:1 gluten-free baking mix!
Dietary modifications can sometimes feel overwhelming, but remember, vegan variations are totally doable for these custard-filled buns. Just replace those eggs and butter with flax eggs and coconut oil.
For those moments when you’re in a pinch, grasp onto those emergency replacements . If you're out of granulated sugar, brown sugar can be used, adding a delicious caramel note.
Kitchen Equipment Essentials
Now, for this venture, you need the right must-have tools . grab your mixing bowls, a whisk, and a rolling pin - these are your best buddies.
Also, a good baking sheet is vital; don’t skip on lining it with parchment paper for easy clean-up.
If you lack a rolling pin, a wine bottle can sub in! It’s all about improvising.
When it comes to preparation tips , mixing dough techniques are essential. knead that dough for a solid 10 minutes until it feels smooth and elastic.
It’s a labor of love, and honestly, you might work a little sweat—but it’s worth it!
To keep your kitchen from turning into a disaster zone, find some good storage solutions . keep your baked buns in an airtight container to keep them fresh for as long as possible.
Let’s Get Baking!
Now that you know the essential ingredients and tools to whip up some cozy norwegian school buns, you're prepped to dive into the heart of baking—those step-by-step instructions for making this delightful treat! just imagine the warm, custardy goodness filled into those soft buns, topped off with coconut.
Sounds heavenly, right?
So grab your apron and let’s bake these scrumptious school buns that’ll impress your family and friends, all while embracing those cultural baking traditions of Norway!
Mastering Professional Cooking: Unlocking the Art Behind the Bun
If you’ve ever dreamed of whipping up something impressive in the kitchen, you're in for a treat! today, we're diving into professional cooking methods with a focus on baking those glorious norwegian school buns with custard filling —or, as the locals say, skoleboller .
These delightful buns are soft and sweet, filled with creamy custard, and usually topped with fluffy coconut. they’re like a warm hug from a norwegian grandma, perfect for an afternoon treat or cozy breakfast.
Let’s roll up our sleeves!
Essential Preparation Steps: Getting Prepped Like a Pro
Before you start, remember the cardinal rule in the kitchen: mise en place! this fancy french term just means having everything in its place.
Measure out your ingredients— 4 cups of flour, ½ cup of sugar , and all that jazz. trust me; it saves time and stress!
Time management is key. you’ll need about 30 minutes active prep , then 60 minutes for the dough to rise.
Keep an eye on the clock—time flies when you're having fun!
And let’s not forget organization strategies . Clean as you go; it makes everything smoother. Safety is a must too—if you're using an oven, watch out for those burns!
Step-by-Step Process: Follow This Recipe
-
Make That Dough:
- Warm up 1 cup of milk (240ml) and mix in 2 teaspoons of yeast . Let it bloom for 5 minutes until frothy.
- In a separate bowl, whisk together 4 cups of flour , ½ cup of sugar , and 1 teaspoon of salt .
- Next, stir in that lovely yeast mixture, along with ½ cup melted butter and 2 eggs . Knead for about 10 minutes until smooth. Patience, my friend!
-
Rise and Shine:
- Place your dough in a greased bowl, cover it, and let it rise in a warm spot for about 60 minutes or until it’s doubled in size.
-
Craft the Custard:
- Heat 2 cups of milk (480ml) in a saucepan. In another bowl, whisk 4 egg yolks , ½ cup of sugar , and ¼ cup of cornstarch until smooth.
- Gradually add that hot milk to the eggs, whisking like your life depends on it. Cook it all over medium heat until thickened. Voila! Creamy custard!
-
Shape and Bake:
- Grab that dough, punch it down, and divide into 12 pieces. Roll them out a bit, stash a spoonful of custard in the middle, and seal them up.
- Place on a parchment-lined baking sheet and let them rise for another 30 minutes . Preheat your oven to 375° F ( 190° C) while you’re at it.
- Brush the tops with an egg wash and sprinkle some coconut before popping them in the oven for about 12- 15 minutes until they’re golden brown.
Expert Techniques: Nail Those Critical Steps
Baking is all about precision. keep your ingredients at room temperature; it actually helps with the dough consistency. check the internal temperature of your buns; they should reach about 190° f ( 88° c) for perfectly baked goodness.
If they look too brown, cover them with foil—no one wants burnt buns!
Success Strategies: Avoiding Common Pitfalls
Now, no one’s perfect, right? A few common mistakes while baking are overworking the dough and not letting it rise adequately. Ensure those ingredients are fresh—yeast that’s expired can ruin your day!
For quality assurance, always taste your custard filling before adding it to the buns. sweetness can vary! and hey, if you're baking with kids, this could be a fun moment to teach them about culinary traditions.
Wrap It Up: Time to Bake!
So there you have it! with the right techniques and a bit of practice, you’ll be able to bake norwegian school buns with custard filling like a seasoned pro.
Enjoy this cozy treat with a steaming cup of coffee or your favorite afternoon tea. plus, they make a perfect addition to any holiday gathering or casual get-together.
And if you’re still hungry for more tips and tricks on baking, or curious about baking kitchen equipment that's a must-have, don't miss out on my next section— additional information .
Let’s keep the baking magic rolling!

Bake Norwegian School Buns with Custard Filling: Tips for Success
Oh my gosh, y’all! if you’re diving into the delightful world of norwegian school buns , or skoleboller , you are in for a treat that your taste buds will thank you for.
Delicious, soft, and bursting with creamy custard, these buns are the ultimate in comfort food. so, let’s break down some pro tips , presentation tricks , and even some fun variations to make this cozy baking experience truly yours!
Pro Tips & Secrets
Chef's personal insights : when i first attempted to make these heavenly custard-filled buns , i was terrified! but here’s the scoop: rely heavily on your yeast .
Make sure it’s fresh, and always test it with warm milk. if it's bubbling, you're golden!
Time-saving techniques : to cut down on wait time, make the custard filling the night before. it’ll save you about 30 minutes, allowing it to chill and thicken beautifully in the fridge.
Trust me; your future self will thank you!
Flavor Enhancement Tips : Want to spice things up? Add a sprinkle of cinnamon or cardamom to the dough. It’ll give you that extra kick of flavor that’ll leave everyone guessing what your secret ingredient is!
Presentation Advice : When it comes to plating, don’t underestimate the power of a simple garnish. A little sprinkle of powdered sugar or a vibrant fruit on the side can change everything from “meh” to “wow!”
Perfect Presentation
Now, let’s talk about plating techniques . there’s something so visually appealing about a beautiful dessert. you can place your buns on a rustic wooden board, maybe even with a cute checkered cloth underneath.
Garnish ideas : a sprinkle of coconut on top isn’t just for flavor; it also adds a lovely texture and visual pop.
If you want to really impress, a light drizzle of icing will make these afternoon tea treats look fancy-schmancy .
Color Combinations : Remember, we eat with our eyes first! Incorporate bright fruits like berries or citrus slices alongside your school buns. The contrast will boost the overall appeal of your presentation.
Storage & Make-Ahead
Storage guidelines : these buns keep well for about 2–3 days when stored in an airtight container at room temperature.
You can also pop them in the fridge if you want them to last an extra day.
Preservation methods : planning to enjoy these later? freeze them! just wrap each bun tightly in plastic wrap and then place them in a freezer-safe bag.
They’ll keep fresh for up to 2 months.
Reheating instructions : when you’re ready to devour them, just pull from the freezer and reheat in the oven at 350° f ( 175° c) for about 10- 15 minutes if frozen.
They’ll be as good as new!
Creative Variations
Flavor Adaptations : Feel free to play with fillings! How about a chocolate custard filling instead? I mean, chocolate always wins!
Dietary Modifications : For a vegan spin, you can substitute the milk and butter with almond or oat milk and vegetable oil.
Seasonal Twists : As Fall rolls around, imagine adding some pumpkin spice to your dough. It’s like cozying up with a warm blanket.
Regional Variations : Not just Norwegian anymore! You could incorporate flavors from Mexican sweet rolls or even use a Japanese custard filling for a delicious twist.
Complete Nutrition Guide
So, what about the numbers? here, i’ve got a quick breakdown for you. each bun is about 250 calories , but don’t let that scare you away.
They’re packed with comfort , filling, and the joy of baking.
Health Benefits : While they’re not a salad, these buns treat you to some calcium from the milk and protein from the eggs. Indulge, but keep in mind portion sizes!
Expert FAQ Solutions
Here’s where I try to piece together some common kitchen mishaps you might run into:
Common Questions : “Why didn’t my dough rise?” It could be your yeast wasn’t active. Always check the expiration date!
Troubleshooting Guide : If your custard filling is too runny, add a touch more cornstarch and heat it gently while stirring.
Success Tips : Patience is key! Let that dough rise and feel the magic of yeast at work.
Encouraging Conclusion
So there you have it! whether you're a novice baker or a seasoned pro, baking norwegian school buns with custard filling can be the perfect weekend project or a delightful addition to your holiday gathering.
Keep these trips and tricks in your back pocket, and you’ll be whipping up those delicious norwegian pastries in no time.
Get ready to impress your family and friends with some of the best bun recipes they’ve ever had! you got this, and happy baking!

Bake Norwegian School Buns with Custard Filling Card

⚖️ Ingredients:
- 4 cups (500g) all-purpose flour
- 1/2 cup (100g) granulated sugar
- 1 teaspoon salt
- 2 teaspoons active dry yeast
- 1 cup (240ml) whole milk, warmed
- 1/2 cup (115g) unsalted butter, melted
- 2 large eggs (room temperature)
- 2 cups (480ml) whole milk for custard
- 4 large egg yolks
- 1/2 cup (100g) granulated sugar for custard
- 1/4 cup (30g) cornstarch
- 1 teaspoon vanilla extract
- 2 tablespoons unsalted butter for custard
- 1 cup (80g) shredded coconut for topping
- 1 egg for egg wash
🥄 Instructions:
- Step 1: In a bowl, combine warm milk and yeast; let sit for 5 minutes.
- Step 2: Mix together flour, sugar, and salt in a large mixing bowl.
- Step 3: Add melted butter, eggs, and yeast mixture to the dry ingredients.
- Step 4: Knead the dough for about 10 minutes until smooth and elastic.
- Step 5: Let dough rise in a warm place for 60 minutes or until doubled in size.
- Step 6: In a saucepan, heat milk until just simmering for custard.
- Step 7: Whisk together egg yolks, sugar, and cornstarch until smooth.
- Step 8: Slowly pour hot milk into the egg mixture while whisking constantly.
- Step 9: Return mixture to the saucepan and cook over medium heat until thickened.
- Step 10: Remove from heat and stir in vanilla extract and butter. Let cool.
- Step 11: Preheat oven to 375°F (190°C) and line the baking sheet with parchment paper.
- Step 12: Punch down the risen dough and divide into 12 equal pieces.
- Step 13: Roll each piece into a ball and then flatten it slightly.
- Step 14: Place a spoonful of cooled custard in the center and seal well.
- Step 15: Place shaped buns on the prepared baking sheet, cover and let rise for 30 minutes.
- Step 16: Brush tops with egg wash and sprinkle with coconut.
- Step 17: Bake for 12-15 minutes or until golden brown.
- Step 18: Let buns cool slightly on a wire rack before serving.
Previous Recipe: 30-Minute Peach Jam: A Sweet Summer Spread for Every Occasion
Next Recipe: How to Bake Pumpkin Bread Rolls - Fluffy and Delicious: A Cozy Family Recipe
