Overnight Soft Dinner Rolls: Effortless and Irresistible
Craving bakery-soft rolls? Try my easy method for baking soft dinner rolls overnight. They're fluffy, buttery, and perfect for any meal or occasion. Let's bake!

- A Cozy Tradition: Baking Soft Dinner Rolls Overnight - Easy Recipe
- The Story Behind the Rolls
- Why You’ll Love These Rolls
- Getting Started with Your Rolls
- Your Go-To Essential Ingredients Guide
- Mastering the Art of Baking Soft Dinner Rolls Overnight - Easy Recipe
- Pro Tips & Secrets for Baking Soft Dinner Rolls Overnight
- Perfect Presentation for Those Fluffy Bread Rolls
- Storage & Make-Ahead Tips
- Creative Variations to Explore
- Complete Nutrition Guide
- Expert FAQ Solutions
- Time to Get Baking!
- Recipe Card
A Cozy Tradition: Baking Soft Dinner Rolls Overnight - Easy Recipe
Oh man, i remember the first time i had a warm, fluffy dinner roll fresh from the oven. it was at my grandma's house during the holidays.
As soon as you walked in, the aroma wrapped around you like a warm hug. seriously, all you could think was, “this is heaven!” ever since, i’ve been obsessed with the idea of baking soft dinner rolls overnight .
You wake up to that sweet, doughy goodness—what's not to love?
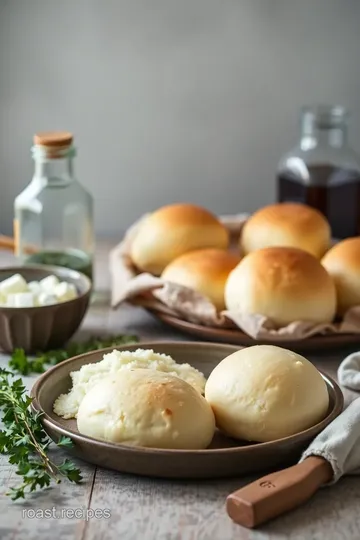
Picture this: a sizable pan of soft dinner rolls rising like fluffy clouds in the warmth of your kitchen. when the dinner bell rings, you can’t wait to dive in.
Grab a pat of butter, and you’re golden. sound good to you? let’s get the lowdown on how to master these little bites of joy!
The Story Behind the Rolls
The history of dinner rolls goes way back, with roots tracing to europe’s traditional bread-making techniques. they were often made for special occasions, and now, they’ve become a staple at american dinner tables.
Today, with everyone chasing simplicity, easy baking recipes like this one are gaining traction. plus, who doesn’t want homemade rolls waiting for them after a good night's sleep?
This recipe is perfect. the prep time is just 15 minutes , and you let the dough rise overnight. that means you can whip them up without added stress.
They’re a real comfort food that's easy to fit into your schedule. so grab your apron, and let’s roll with it—literally!
Why You’ll Love These Rolls
Let’s not beat around the bush. these rolls are a crowd-pleaser. just imagine serving pillow soft rolls at your next family dinner or during the holidays.
They’re versatile too! slather them with butter, dip them in gravy, or stuff them with your favorite fillings. the best part? they come with health perks! these rolls are packed with carbs and, when made with whole ingredients, can be a hearty addition to your meal.
Each bite gives you a delightful combination of soft, fluffy bread without being overly sweet. you can enjoy them fresh out of the oven or even save some for later.
Seriously, i’ve made them for easy brunch recipes and as dinner party sides . and hey, if you accidentally have some leftovers (or are just super generous), they freeze beautifully.
Just pop 'em in the oven, and you’re all set!
Getting Started with Your Rolls
When you’re ready to jump in, it’s essential to gather your ingredients. you’ll need all-purpose flour, instant yeast, sugar, salt, milk, butter, and eggs.
Nothing too fancy here—just the building blocks for those fluffy dreams!
Oh, and if you’re a beginner, don’t sweat it. this is a super quick dinner roll recipe , and you don't have to knead like a pro.
Trust me, the overnight yeast dough does some magic while you snooze.
As we transition into the ingredients section, think about how easy it would be to whip these up. Honestly, you could even get the kids involved—who wouldn’t love making doughy creations? Just imagine the laughter and memories!
So, if you're ready to give this a shot, let's talk ingredients and get those flours flying!
Your Go-To Essential Ingredients Guide
Hey there, fellow food lovers! let’s talk kitchen essentials—those must-have ingredients that can transform your cooking game from “meh” to “wow!” whether you’re whipping up homemade rolls or a quick dinner, having the right stuff in hand makes all the difference.
So grab a cup of coffee (or tea, no judgement), and let's dive into this essential ingredients guide that’ll make you feel like a pro in no time!
Premium Core Components
First things first—the star players of your kitchen. Here are some Premium Core Components you definitely want to have in stock.
Detailed Measurements (US & Metric)
You want to get this right, right? for instance, when making your fluffy homemade bread , you need to know that 1 cup of flour is about 120g .
A little extra flour can turn those rolls into bricks, and that’s just tragic.
Quality Indicators for Each Ingredient
When you're shopping, look for fresh ingredients. Check those dates! Fresh yeast should smell yeasty and a tad sweet. Flour? Give it a sniff—if it smells off, it’s time to say goodbye.
Storage Guidelines and Shelf Life
Want your ingredients to last? keep that flour in a cool, dry place . most spices? store them in dark cabinets away from heat.
Trust me; they’ll lose flavor faster than you can say “dinner rolls” if you're not careful.
Freshness Tips and Selection Criteria
Did you know a fresh herb can change the flavor of your dish entirely? Always choose vibrant, perky herbs. If they're wilted or brown, they’re past their prime.
Signature Seasoning Blend
Next stop: flavor town! Let’s get into the Signature Seasoning Blend .
Essential Spice Combinations
A couple of classic combos can elevate your cooking from blah to fabulous. Think garlic powder with onion powder. Or consider Italian seasoning for that warm, comforting vibe.
Herb Selections and Pairings
Basil and tomatoes? Match made in heaven. Rosemary and garlic? Pure magic. Use fresh herbs where you can; they just bring a whole new level of yum.
Flavor Enhancers and Aromatics
Onions, garlic, and a splash of vinegar can transform any dish. Keep these staples in your kitchen; they’re absolute game changers.
Regional Variations and Alternatives
Ever try sweet dinner rolls with a hint of cinnamon? Or maybe a little bit of jalapeño for a kick? Explore regional twists and see what sparks joy!
Smart Substitutions
We all know that sometimes, life happens. Here’s where Smart Substitutions come in handy.
Common Alternatives
Out of eggs? Use applesauce (1/4 cup per egg) for sweet recipes. Need butter? Vegetable oil works too!
Dietary Modifications
Gluten-free friend? Use a quality gluten-free flour blend. It’s easier now than ever to eat deliciously, no matter your diet.
Emergency Replacements
No baking powder? Mix baking soda with vinegar for a quick fix. Every chef needs a go-to substitution cheat sheet for those “oops” moments.
Seasonal Options
Use seasonal fruits for unique flavors. Peaches in summer? Yes, please! They can go into your rolls for family dinners or be enjoyed fresh.
Kitchen Equipment Essentials
Now that we’ve got the ingredients sorted, let’s chat about the Kitchen Equipment Essentials .
Must-Have Tools
Grab a trusty whisk, measuring cups, mixing bowls, and a good baking sheet. You'll be set for most easy baking recipes .
Alternative Equipment Options
No bundt pan? No problem! Use a muffin tin for charming, individual serving sizes of deliciousness.
Preparation Tips
Don’t have a rolling pin? Use a wine bottle. Seriously! It’s a great hack in a pinch.
Storage Solutions
Keep your spices in airtight containers to maintain their power. You don’t want to taste stale spices in your next buttery dinner rolls recipe .
And there you have it, folks! with these essential tips, you’ll be well-equipped to tackle anything from the baking soft dinner rolls overnight - easy recipe to fancy holiday bread recipes.
Time to roll up your sleeves and get cooking! stay tuned for the next section, where we’ll dive right into making those warm, yummy dinner rolls.
Let's do this together!
Mastering the Art of Baking Soft Dinner Rolls Overnight - Easy Recipe
Let’s face it – there’s something irresistible about the smell of freshly baked bread , right? imagine this: you wake up to the aroma of soft, fluffy, homemade rolls tickling your senses.
Sounds dreamy, doesn’t it? well, baking soft dinner rolls overnight with an easy recipe is a total game-changer! perfect for any meal, these pillow-soft rolls will soon make it to the top of your comfort food ideas list.
Essential Preparation Steps
First off, we gotta talk about mise en place . it’s fancy french for having everything ready—like arranging your ingredients like you’re setting up a first date! get your 4 cups of all-purpose flour , 1 packet of instant yeast , and all the other goodies in place.
It makes everything smoother when you start mixing.
Now, time management tips are super important. when preparing your rolls, it’s all about timing. make sure you allocate about 1 hour for rest and then 10- 12 hours for overnight rising .
Trust me, patience is key.
Let’s not forget about organization strategies too. i like to have a clean workspace! it keeps me from feeling like i've been hit by a flour tornado.
And safety! make sure that oven rack is all set before you start baking — nobody wants a burned hand during the process.
Step-by-Step Process
Okay, let’s dive into the baking process! Here’s how you can whip up those delicious rolls:
-
Prepare the Dough: In a large mixing bowl, whisk together your flour, yeast, sugar, and salt.
-
Combine Ingredients: Gradually add your warmed milk (at 110° F), melted butter, and eggs. Mix it till you get a sticky dough.
-
Knead: Dust your counter with flour and knead the dough for just 5- 7 minutes . It should feel smooth and elastic.
-
First Rise: Put your dough in a greased bowl and cover with plastic wrap. Let it rise at room temp till it’s doubled in size.
-
Shape the Rolls: Punch down the dough – yes, it feels great! Divide it into 12 pieces, forming each into a ball.
-
Overnight Refrigeration: Pop the rolls in the fridge, covered tightly, and let them rise overnight (8- 12 hours).
-
Second Rise: In the morning, let them sit at room temp for 30- 45 minutes .
-
Preheat the Oven: Set it to 350° F .
-
Bake: Brush the tops with leftover melted butter and bake those beauties for 25- 30 minutes until they’re golden brown and sound hollow when tapped.
-
Cool and Serve: Let them cool before moving to a wire rack.
Expert Techniques
Getting the perfect yeast dinner rolls means paying attention to a few critical steps. Always proof that yeast first! If it doesn’t froth after a few minutes in warm milk, it’s not good!
Quality checkpoints are also crucial. when kneading, don’t overdo it or you’ll have tough rolls instead of fluffy homemade bread.
Use your senses! look for a hint of golden brown and a hollow sound to determine doneness.
If things go wrong, don’t panic! If your dough feels too sticky, add a smidge of extra flour. If it's too dry, a splash of water or milk will help.
Success Strategies
Avoiding common baking mistakes can change your game! don’t skip the overnight rise; that’s where the magic happens. also, make sure all your ingredients are at room temperature .
Cold eggs or butter just won’t cut it.
Store any leftovers in an airtight container, but fair warning: they might not last long in my house! for make-ahead options, these rolls also freeze well.
Stash them away for a rainy day when you want to impress.
In a nutshell, this easy yeast bread recipe will leave you with the best dinner rolls ever—perfectly soft, subtly sweet, and absolutely delicious.
Get ready to woo your family and friends while serving those fluffy bread rolls alongside any meal.
So there you have it! From baking to serving, you're all set to impress. Keep these baking tips for rolls close and let’s roll into our last section: Additional Information…
Pro Tips & Secrets for Baking Soft Dinner Rolls Overnight
Alright, let’s dive into the secrets that will transform your baking game. first things first: a little patience goes a long way! don’t rush the dough; let it rise properly.
You might be in a hurry, but trust me, those fluffy, pillow-soft rolls are totally worth the wait.
Time-saving techniques ? you got it! mix your dough the night before. seriously, 15 minutes of prep, and you can forget about it overnight.
The next morning, all you have to do is bake these delicious homemade rolls while you sip your coffee. it’s like magic!
When it comes to flavor enhancement , consider adding a pinch of garlic powder or herbs. it makes a huge difference in taste! plus, don’t skip the melted butter brush right before baking—it's like giving your rolls a warm hug.
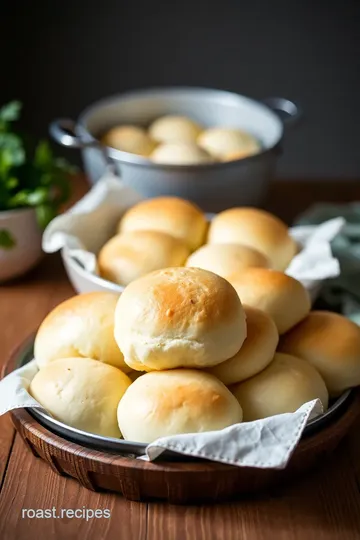
Now, let’s talk presentation . plating is key, especially if you're sharing these rolls at a family dinner. pile them high in a beautiful basket, and toss a cloth over the top to keep 'em warm.
It’s comfort food at its finest!
Perfect Presentation for Those Fluffy Bread Rolls
You know what they say: we eat with our eyes first! use some simple plating techniques . arrange those rolls in a spiral or stack 'em high for drama.
It’s gonna make that instagram feed pop!
Garnish ideas? try fresh herbs or a sprinkle of flaky sea salt on top right after they come out of the oven.
The contrast of the golden brown rolls against the green is just stunning. trust me; your friends will be taking pics before even taking a bite!
Color combinations really matter too. If you're serving these rolls alongside a vibrant vegetable dish, the neutral color of the rolls balances everything beautifully.
Storage & Make-Ahead Tips
I mean, what's better than waking up to dough ready to go? but hey, if you happen to have some left (though i doubt it), here’s how to keep those rolls fresh.
You can store them in an airtight container for up to 3 days. for longer storage, freeze them and they’ll keep for up to a month.
Just reheat them in the oven at 350° f until warm. no one will know they weren’t just baked !
Speaking of make-ahead, this is the perfect easy baking recipe for those busy weeks. you know, when you’d rather be binge-watching your favorite show instead of dough-watching? just pull your refrigerator dough rolls out the night before and let them rise in the fridge until morning.
Creative Variations to Explore
Let’s get creative with these rolls! how about some flavor adaptations ? you could add some sautéed onions or cheese to the dough.
Or mix in some cinnamon and brown sugar for sweet dinner rolls instead. oh my gosh, your breakfast guests will be asking for seconds!
Have any dietary preferences? No problem! Sub out regular flour for a gluten-free version or swap the milk for any plant-based alternative. It’s all about making this recipe work for you.
Seasonal and regional twists can be really fun too. Think pumpkin spice in the fall or herbed rolls for a Mediterranean flair; the possibilities are endless!
Complete Nutrition Guide
Now, let’s have a quick chat about the nutrition side of things. each roll packs around 180 calories —perfect for a comfortable side dish without feeling guilty.
These rolls offer a nice balance of carbs and fats, making them a delightful addition to your meal.
And if you're counting portions, this recipes yields about 12 rolls, so adjust accordingly! Share them at family gatherings, or keep them all to yourself (we won’t tell!).
Expert FAQ Solutions
It's super common to have a few questions while baking. if your rolls aren’t rising, check your yeast! it should be fresh.
If your dough ends up too sticky, a touch of flour can save the day.
Feeling adventurous? Want to swap out ingredients? Go for it; just be ready to experiment. That's part of the fun of baking!
Time to Get Baking!
Baking soft dinner rolls overnight - easy recipe is not just about making bread; it’s about creating moments. these rolls are the kind of comfort food that brings people together.
So grab your ingredients and get started! i promise, you’ll create rolls that are not only fluffy homemade bread but also memories that last.
Happy baking, and enjoy the compliments heading your way!

Overnight Soft Dinner Rolls: Effortless and Irresistible Card
⚖️ Ingredients:
- 4 cups (480g) all-purpose flour
- 1 packet (2¼ tsp or 7g) instant yeast
- ½ cup (100g) granulated sugar
- 2 tsp (10g) salt
- 1 cup (240ml) whole milk, warmed (110°F - 43°C)
- ⅓ cup (75g) unsalted butter, melted
- 2 large eggs, at room temperature
- 2 tbsp (30g) unsalted butter, melted (for finishing)
🥄 Instructions:
- Step 1: In a large mixing bowl, whisk together the flour, yeast, sugar, and salt.
- Step 2: In a separate bowl, combine the warmed milk, melted butter, and eggs; mix well.
- Step 3: Gradually add the wet ingredients to the dry ingredients.
- Step 4: Stir with a wooden spoon or spatula until a sticky dough forms.
- Step 5: Turn the dough onto a floured surface. Knead gently for 5-7 minutes until smooth and elastic.
- Step 6: Place the dough in a greased bowl, cover with plastic wrap or a towel. Allow the dough to rise for 1 hour at room temperature (until doubled).
- Step 7: Punch down the dough and divide it into 12 equal pieces.
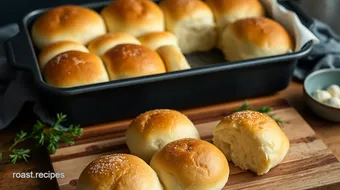
- Step 8: Shape each piece into a smooth ball and place in a greased 9x13 inch baking dish.
- Step 9: Cover the dish with plastic wrap or a towel and refrigerate overnight (8-12 hours).
- Step 10: In the morning, remove the rolls from the fridge and let them sit at room temperature for 30-45 minutes to rise slightly.
- Step 11: Preheat your oven to 350°F (175°C).
- Step 12: Brush the tops with melted butter.
- Step 13: Bake for 25-30 minutes until golden brown and sound hollow when tapped.
- Step 14: Let the rolls cool in the pan for a few minutes before transferring them to a wire rack.
Previous Recipe: How to Make Bake Potato Rolls: Soft & Fluffy Knots - A Family Favorite
Next Recipe: Easy Whip Cream into Delicious Homemade Butter: A Creamy Kitchen Secret