Make Mulberry Jam: Sweet & Tart Delight
Looking for a delicious way to preserve mulberries? Make Mulberry Jam: Sweet & Tart Delight with my grandma's cherished recipe that brings summer to your toast!

- Sweet Adventures in the Kitchen: Let's Make Mulberry Jam
- Essential Ingredients Guide for Jamming Greatness
- The Art of Cooking: Mastering Jam with Professional Techniques
- Pro Tips & Secrets for Making Mulberry Jam
- Perfect Presentation: Make Your Jam Stand Out
- Storage & Make-Ahead Tips
- Creative Variations for Your Mulberry Jam
- Complete Nutrition Guide
- Expert FAQ Solutions: Troubles Before You Cook
- Conclusion: Get Jamming!
- Recipe Card
Sweet Adventures in the Kitchen: Let's Make Mulberry Jam
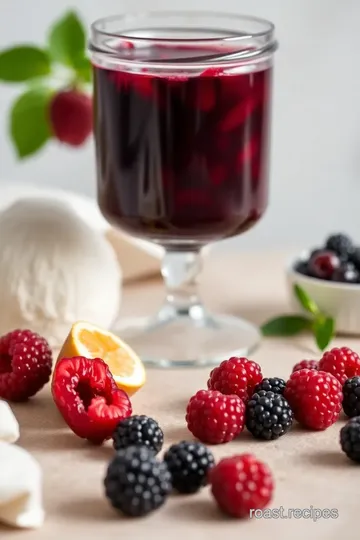
Ever had that moment when you bite into something so fresh and delicious that you just can’t help but smile? that’s how i felt last summer when i stumbled upon a tree bursting with plump mulberries in my neighbor's backyard.
I gathered a bucket and thought, “what the heck am i gonna do with all these?” then it hit me: make mulberry jam: sweet & tart delight ! the thought was too good to pass up, and honestly, i was a little bit excited.
If you’re itching to know how to make jam like this, keep reading!
A Little Jam History
Mulberries are no stranger to the jam-making scene. they’ve been hanging around for centuries and come from regions worldwide, particularly thriving in warm climates.
The jam itself has made its way from rustic homes to trendy brunch spots, becoming a staple for sweet and tart ensoiasts alike.
It’s like the comfort food of fruit preserves, right?
Now, let me break it down for you. this jam doesn’t just take two minutes and a sprinkle of fairy dust to create.
You’ll spend about 45 minutes total— 15 minutes of prep and 30 minutes of cooking. it's considered medium in difficulty, so if you’ve got a basic knack for cooking, you’re golden! and while we’re keeping it real, you can whip up about 4 cups of this jam—enough to share or hoard, whichever you prefer!
Why You’ll Love This Jam
What’s not to love about mulberry jam ? for one, there are some pretty neat health benefits tied to these little berries.
They’re packed with antioxidants, and they can even aid digestion. plus, let’s not forget how versatile this jam is! whether slathering it on warm toast, drizzling it over pancakes, or dolloping it on ice cream, this jam has got your back for all occasions.
Special occasions? pfft. you could serve this jam at brunch with a side of mimosas or pull it out for a cozy dessert night.
Honestly, it can elevate any mundane breakfast to a whole new level. it's one of those creative jam flavor combinations that just feels special when you share it.
And here’s a fun fact: homemade fruit preserves like this have a longer shelf-life than you might think. if you follow the canning safety tips i’ll share in the ingredient section, your jam can last for months.
Talk about a taste of summer when the winter chill rolls in!
The Scoop on Ingredients
Now that you’re probably super excited to start jamming, let’s chat about what you need to gather. you’ll want to look for fresh mulberries—about 4 cups rinsed and ready to go.
Grab 2 cups of granulated sugar, about 1/4 cup lemon juice , and maybe toss in some cinnamon if you’re feeling adventurous.
I remember the first time i made this. the kitchen smelled heavenly. but make sure your pots and equipment are ready to rumble! nothing beats smart jamming techniques , mainly how to sterilize glass jars to keep everything fresh and safe.
And don't sweat it if you've never made jam before. just follow the steps carefully: mash these berries like they owe you money, cook them up, and watch that consistency come together.
Oh, and if it gets too thick? don’t panic—there are jam consistency tips that'll have you figuring it out in no time.
So, to sum it up, making mulberry jam is not just a culinary project; it’s a fun little adventure! you get to dive into the flavors of summer, preserve them, and share that joy with everyone.
I can’t wait to dive into the ingredient list with you; let’s keep this easy and flavorful!
Are you ready? Grab your pots and pans, and let’s get jamming!
Essential Ingredients Guide for Jamming Greatness
Getting into the jam-making game? You’re in for a treat! Nothing beats that homemade touch. So, let’s dive into the essential ingredients you'll need for your next kitchen adventure, particularly when you're looking to Make Mulberry Jam: Sweet & Tart Delight !
Premium Core Components: You Gotta Pay Attention
When it comes to measuring , you'll want to be precise. For mulberry jam, you’ll need:
- 4 cups of mulberries (that's about 600 grams, if you’re being metric about it).
- 2 cups of granulated sugar (400 grams, for the sweet magic).
- 1/4 cup of lemon juice (60 ml for that zesty kick).
Pro tip? Always check for quality indicators ! Fresh mulberries should look plump and juicy, not squished or moldy.
Storage guidelines and shelf life are crucial. if you have any leftover jam—which, let's be honest, is unlikely—store it in sterilized jars in a cool, dark place.
The shelf life for unopened, homemade jam is around 1 year , but once opened, you'll wanna pop it in the fridge and use it up within a few weeks.
Signature Seasoning Blend: Spice It Up!
While mulberry jam is pretty fantastic on its own, don't shy away from experimenting with some signature seasoning . Just think about this:
- Ground cinnamon adds a warm hint of spice—let's say 1/2 teaspoon —if you’re feeling adventurous.
Herbs are less common in sweet jams but feel free to mix it up a little! Basil can give an unexpected twist if you’re up for a creativity boost in your flavors.
Smart Substitutions: Flexibility is Key
Life happens, and sometimes you run out of ingredients. Don’t sweat it! Here are some common alternatives :
- Instead of sugar, try honey for a different sweetness. Adjust the quantity—honey is sweeter, after all!
- If you can’t find fresh mulberries, frozen mulberries work just as well. Just avoid the ones with added sugar.
Need some dietary modifications ? If you're going for low sugar, you can use sugar substitutes designed for jam-making.
Kitchen Equipment Essentials: Gear Up
Now, about your kitchen equipment —make sure you've got the right tools ready to go:
- A large, heavy-bottomed pot—this helps in even cooking so the jam doesn’t burn.
- A wooden spoon or spatula for stirring.
- A potato masher or an immersion blender to mash the mulberries.
Preparation tip: Always sterilize your jars! Boil them in water for 10 minutes to be sure they’re clean and safe for canning.
Jamming Techniques That Shine
When you're making mulberry jam , keep in mind a few things:
- Cook the jam until it reaches 220° F ( 104° C) to ensure it sets properly.
- If you want the right consistency , you can test it by dropping a spoonful on a cold plate—if it wrinkles when you push it, you’re good to go!
Transition to Instructions: Let’s Get Cookin’!
And there you have it! Now you’re armed with all the knowledge to create your own mulberry jam masterpiece. Whether you’re spreading it on toast, dolloping it on pancakes, or using it as a topping for desserts, this sweet and tart jam is bound to impress!
So, ready to get jammin’? Grab your ingredients and equipment, and let’s dive into the detailed instructions!
The Art of Cooking: Mastering Jam with Professional Techniques
Alright, friends, gather 'round! today, we’re diving into one of the sweetest kitchen endeavors you can take on: make mulberry jam: sweet & tart delight .
Seriously, there's nothing quite like the taste of homemade fruit preserves slathered on toast. plus, mulberries have a nice balance of sweetness and tartness that just makes my taste buds dance.
So, grab your fruit and get ready to jam!
Essential Preparation Steps
Before you dive into the juicy goodness, let’s talk prep. you might’ve heard the fancy term mise en place , but it just means having everything ready to go.
So, wash your 4 cups of mulberries and make sure to remove those stems. for real, nobody wants to bite down on a stem while enjoying their jam.
Now, let’s get organized! Chop up your ingredients, grab your jars, and set everything out. Being organized means less stress when you’re cooking. I’ve totally been there—trying to find the sugar mid-cooking!
And hey, don’t forget about safety. make sure your cooking surfaces are clean, and be mindful of canning safety tips .
It’s super important to avoid any cross-contamination while you’re making your sweet and tart jam .
Step-by-Step Process
Ready for the step-by-step? Heck yeah! Keep your temperature control points in mind, and let’s get into it.
-
Prepare the Mulberries :
- Rinse and remove the stems. No one likes a stemmy jam!
- Mash the mulberries with a potato masher or use an immersion blender if you prefer smoothness.
-
Combine Ingredients :
- In your heavy-bottomed pot, mix your mashed mulberries with 2 cups of granulated sugar and 1/4 cup of lemon juice – don’t skip that tang!
-
Cook the Jam :
- Set your pot over medium heat , stirring until the sugar dissolves. Then, increase the heat and bring to a rolling boil , stirring occasionally until it’s bubbling and happy.
-
Test for Doneness :
- Keep an eye on it for about 30 minutes , stirring often. You want it to reach around 220° F ( 104° C) – that’s the sweet spot where jam magic happens!
-
Prepare Jars :
- Sterilize your jars by boiling them in water for 10 minutes . Clean jars, happy jam!
-
Fill Jars :
- Carefully ladle that hot jam into your warm jars, leaving 1/4 inch of headspace .
-
Seal and Cool :
- Wipe the rims clean, seal them up tight, and let them cool. You’re going to want to check how awesome your work looks!
Expert Techniques
Now, here are some expert techniques i’ve learned along the way. trust me, these tips are game-changers. monitor the jam consistency tips and make sure to test it on a cold plate to see if it's set right.
If it wrinkles when you push it, you’re golden!
Oh, and please avoid common mistakes like not stirring often enough—it can burn! no one wants burnt flavors in their berry jam guide .
If it’s taking too long to thicken, consider cranking up the heat a smidge and keep stirring.
Success Strategies
Listen, I’ve had my fair share of jam fails. But if you keep an eye on timing precision and pay attention to visual cues for doneness, you’ll set yourself up for success!
Here’s a little pro tip: i learned that using under-ripe mulberries can actually give your jam that extra tart zing that is just divine.
And don’t forget—label those jars with the date and type of jam; it’s so helpful for later!
And if you're eager to make the process even easier, consider some make-ahead options ! You can prepare and jar it up to a week before you need it. Boom, done!
Final Thoughts
Making mulberry jam is not just about the sweet spread; it’s a great way to preserve summer’s bounty and enjoy that invigorating taste all year round.
Plus, it gets bonus points for being inspired by your own seasonal berry picks! seriously, how awesome is that?
So, are you ready to take on the challenge of canning mulberry jam ? i promise, it’s worth every bit of effort.
And if you need any more guidance or tips on the journey, stay tuned for my next section— additional information .
Happy jamming, friends!
Pro Tips & Secrets for Making Mulberry Jam
Let me tell ya, when it comes to making mulberry jam , the magic really lies in the little details.
I’ve whipped up my fair share of easy fruit jam recipes , and trust me, a few personal insights can make all the difference.
First off, let’s talk about timing. if you're stretched for time, use a potato masher — it's a game changer.
Mash those berries up but don’t overdo it if you like some chunks. you can even throw 'em in an immersion blender for a silkier finish.
And while cooking, keep a close eye — nobody wants burnt jam. stirring consistently is key; it not only helps mix but prevents that sticky disaster we all dread.
Now, here's a quick flavor enhancer: add a pinch of ground cinnamon . It really amplifies the whole sweet and tart vibe. Those mulberries just love it!
Perfect Presentation: Make Your Jam Stand Out
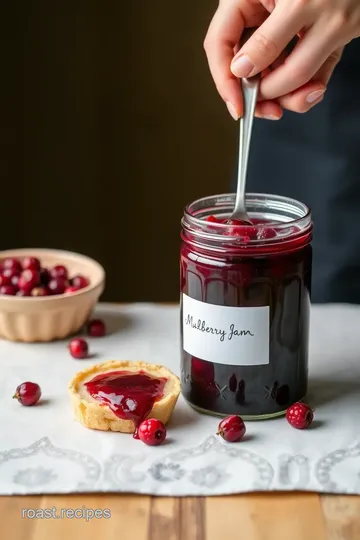
Okay, so you’ve got your mulberry jam recipe down, but how do you make it look amazing? Plating might feel like a fancy restaurant thing, but you can totally do it at home!
When you're filling your jars, make sure to leave some headspace — about 1/4 inch is perfect. after sealing, you can place a cute label on top.
How about using some twine around the neck of the jar, or sticking on a sprig of mint? that pop of green looks fab against that deep purple jam.
Consider pairing your jam with some colorful toast or a creamy cheese for a pretty brunch spread. Seriously, it's the little touches that make you feel like a kitchen superstar!
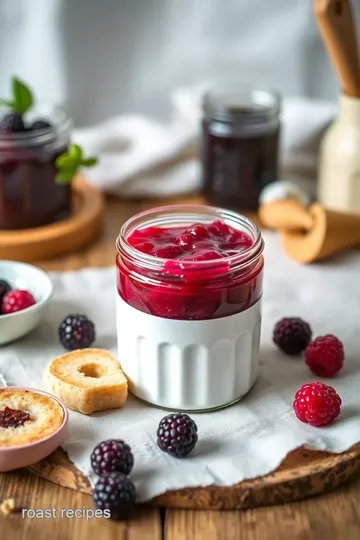
Storage & Make-Ahead Tips
Now, for the fun part: preserving your deliciousness! once your jam has cooled, pop it in the fridge after it’s sealed.
Homemade fruit preserves like this can easily stay fresh for about 1 year if you store them in a cool, dark place.
If you are feeling super organized, why not make a batch now and save some for the winter? that sweet summer memory will warm you up on those chilly days.
When you're ready to dive back in, reheat in a small pot over low heat, stirring occasionally. it’s like summer in a jar, opening it up!
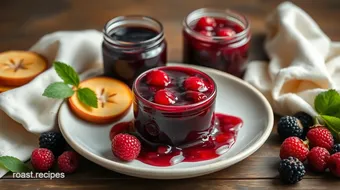
Creative Variations for Your Mulberry Jam
You know how you sometimes want to shake it up and try something new? that’s where creative jam flavor combinations come in.
Want a twist? mix in some raspberries or blackberries for a berry bonanza. feeling adventurous? splash in some bourbon during the cooking for a complex flavor profile that impresses.
If you want to keep it seasonal, swap out the lemon juice with fresh orange juice when those summer oranges come into play.
The possibilities are endless with these tart berry recipes .
Complete Nutrition Guide
Now, listen up! making jam doesn’t just mean enjoying it; it’s also about understanding what you’re putting into your body.
Mulberries are quite the hidden gem — they're loaded with antioxidants and vitamins. a serving of jam packs in some fiber, too!
But, keep in mind those nutritional information for jams can vary based on ingredients. if you’re watching your sugar intake, consider using honey instead of granulated sugar.
Your jam consistency tips will still apply.
Expert FAQ Solutions: Troubles Before You Cook
You might run into a few hiccups, i get it. a common question i hear is: “what if my jam is too runny?” don’t fret! just cook it a bit longer.
You can also check for the right consistency by putting some on a cold plate; if it wrinkles, you’re good to go!
If you're new to canning mulberry jam , be sure to follow canning safety tips to avoid any mishaps. It’s super important to sterilize your jars first.
Conclusion: Get Jamming!
So there it is, your ultimate guide to make mulberry jam: sweet & tart delight ! don’t you just love how this recipe captures the essence of summer, no matter the season? go ahead, roll up your sleeves, pick those mulberries, and get jamming.
Trust me, you’re gonna want to share this with friends — once they taste it, they’ll be begging for the recipe.
Happy cooking, friends!
Make Mulberry Jam: Sweet & Tart Delight Card
⚖️ Ingredients:
- 4 cups mulberries, rinsed and stems removed (about 600g)
- 2 cups granulated sugar (400g)
- 1/4 cup lemon juice (60ml)
- 1/2 teaspoon ground cinnamon (optional)
🥄 Instructions:
- Step 1: Rinse and remove the stems from the mulberries. Mash them gently with a potato masher or use an immersion blender for a smoother consistency.
- Step 2: In a heavy-bottomed pot, combine the mashed mulberries, sugar, lemon juice, and cinnamon (if using).
- Step 3: Over medium heat, stir until the sugar dissolves.
- Step 4: Increase heat and bring the mixture to a rolling boil, stirring occasionally.
- Step 5: Cook for approximately 30 minutes or until the mixture thickens. Use a food thermometer to check if it reaches about 220°F (104°C).
- Step 6: While the jam is cooking, sterilize jars and lids by boiling them in water for 10 minutes.
- Step 7: Ladle the hot jam into the sterilized jars, leaving about 1/4 inch of headspace.
- Step 8: Wipe the rims of the jars clean and seal them tightly. Let them cool at room temperature before storing.
Previous Recipe: How to Bake Victoria Sponge Cake Delight Quick: A Family Favorite
Next Recipe: How to Bake Zucchini Boats with Savory Italian Filling: The Ultimate Comfort Food!