Crispy Broasted Chicken
Ever wondered how to achieve that perfect crispy broasted chicken? Let me share my family’s tips and a mouthwatering recipe that you can't resist.

- Essential Ingredients Guide for Perfect Crispy Broasted Chicken
- Professional Cooking Method: Mastering Crispy Broasted Chicken
- Pro Tips & Secrets to Broasted Perfection
- Perfect Presentation: Make It Shine
- Storage & Make-Ahead: Savvy Cooking
- Creative Variations: Shake It Up!
- Expert FAQ Solutions: Chicken Whisperer
- Conclusion: Get Frying!
- Recipe Card
Oh my gosh, let me take you back to that sunny sunday afternoon when i first tried making broasted chicken .
I was hosting a family gathering, and my aunt, known for her killer juicy fried chicken , was coming over.
Talk about pressure! i wanted to impress everyone, and that's when i stumbled upon this cooking method called the broasting method .
It’s like the lovechild of pressure cooking and deep frying and trust me, it delivers the crunchiest, most flavor-packed chicken you'd ever dream of.
Seriously, who doesn’t want chicken that’s crispy on the outside and succulent inside?
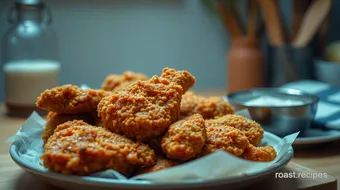
Now, let’s dive into the delicious world of crispy broasted chicken . it’s not just a meal; it’s a dinner party showstopper and an ultimate family-friendly chicken dinner.
This dish has deep roots that trace back to the 1960s in the u.s. it all began with a nifty frying contraption known as the broasted fryer , and it quickly became popular for its ability to lock in moisture while creating that golden-brown, crispy coating we all crave.
Fast forward to today, and it's everywhere—from restaurants to backyard bbqs.
Recipe Overview
Now, let's break it down. making crispy broasted chicken isn’t super complicated, but it does take a little planning. you need about 2 hours and 45 minutes to nail it, with just 15 minutes of active prep time .
Sure, marinating can seem like a drag, but trust me, it's totally worth it when you bite into that tender, flavorful chicken.
And the cost? well, it’s relatively easy on the wallet too, especially compared to dining out. you can serve 4-6 people without breaking the bank!
Here’s a fun fact: did you know that the broasting technique helps reduce the amount of oil absorbed by the chicken? this means you can indulge without that heavy, greasy feeling afterward.
Plus, who can resist the mouthwatering aroma wafting from the kitchen when you’re frying chicken? it’s practically the smell of home!
Key Benefits
Let’s chat about the benefits since this isn’t just about taste; it’s also about health! using a buttermilk marinade chicken not only adds flavor but also tenderizes the meat, making it juicy.
Plus, by utilizing the broasted fryer , you get a dish that’s more efficient and often healthier than many traditional deep frying chicken recipes .
You know those nights where you need to whip up something quick but still want to impress? this easy broasted chicken fits right in.
It’s perfect for casual family dinners or big celebrations like fourth of july bbqs. pair it with classic chicken sides like coleslaw or mashed potatoes , and you’ve got a feast!
Let’s not forget how versatile it is! want to make it spicy ? adjust the cayenne for a kick. want it more herby? throw in some dried oregano or thyme.
It’s all about making it yours. oh, and did i mention it’s also gluten-free friendly if you swap the flour? how cool is that?
So, are you ready to dive deeper into how to create this mouthwatering meal? Let’s check out the ingredients you’ll need to get that crispy chicken coating just right!

Essential Ingredients Guide for Perfect Crispy Broasted Chicken
When it comes to crafting the best broasted chicken , it’s all about using the right ingredients and techniques. Let's dive into your kitchen essentials, so you can whip up a crispy fried chicken that everyone will rave about!
Premium Core Components: Know What You're Working With
First things first, let’s talk ingredients! You gotta start with the basics that make your chicken sing.
-
Buttermilk : For the marinade, you’ll need 1 cup (240 ml) . It’s the secret to juicy, tender chicken. The acidity helps break down proteins, making your chicken ultra-tender.
-
Seasoned Flour : You'll mix 1 cup (120 g) of all-purpose flour with spices like paprika and cayenne. That's where your flavor comes in!
-
Chicken : Choose any combo of chicken pieces, preferably bone-in and skin-on for that juicy goodness.
To keep everything fresh, store your ingredients properly. buttermilk can last about 2-3 weeks in the fridge, while your spices should be used within a year.
And always check for freshness—nobody wants dusty flavors in their chicken!
Signature Seasoning Blend: Spice It Up!
Now, let’s make that chicken pop! The right amount of spices can turn your dish from basic to WOW .
-
Essential Spice Combinations : Consider mixing garlic powder, onion powder , and smoked paprika for a rich flavor profile.
-
Herbs and Aromatics : Dried thyme or rosemary can be a game changer! They add that garden freshness that complements the crispy coating perfectly.
-
Regional Variations : Take a cue from Southern cooking—with a little bit more cayenne pepper or some hot sauce, you can kick the heat up for that spicy broasted chicken vibe!
Smart Substitutions: No Panic Needed
We all know that cooking can sometimes throw a curveball. Here’s how to keep calm.
-
Common Alternatives : No buttermilk? Mix milk with a splash of vinegar as a substitute. This creates a similar tangy effect, perfect for marinating.
-
Dietary Modifications : Gluten-free? No worries! Just swap out the flour with a gluten-free blend for that crispy coating.
-
Emergency replacements : if you don’t have paprika, you can use cayenne pepper (although it’ll make it spicy!). or if you’re totally out of hot sauce, trust me, it’ll still taste good without it.
Kitchen Equipment Essentials: Tools of the Trade
Now let’s talk about the gear! Learning the best chicken frying techniques is a breeze with the right tools in hand.
-
Broasted fryer : this is your star! it combines pressure cooking with frying, giving you that unrivaled crispiness while keeping the chicken juicy.
If you’re new to this, make sure to check the manual for the right oil temperature at 350° f ( 175° c) .
-
Alternative Equipment Options : If you don’t have a broasted fryer, don’t sweat it! A good ol’ pressure cooker can work. Just remember to adjust your cooking times.
-
Other must-haves : invest in a cooking thermometer. knowing the internal temperature for chicken (that’s 165° f / 74° c for doneness) is key.
Also, tongs are super handy for flipping your chicken without a mess.
So, whether it's marinating that chicken for ultimate flavor or tweaking ingredients on the fly, mastering these elements will set you up for success.
Trust me, when you start with the right ingredients, you’re halfway to a delightful family-friendly chicken dinner.
Ready to roll up your sleeves and dive into your Crispy Broasted Chicken recipe? Let’s take all this knowledge and bring it into the kitchen, where the real magic happens!
Professional Cooking Method: Mastering Crispy Broasted Chicken
So, you wanna learn how to make crispy broasted chicken ? you’ve hit the right spot! this isn't just any fried chicken.
We’re talking about a game-changer that combines pressure cooking and frying to give you juicy meat under a crispy golden crust.
Fear not; i'm here to break it down in a way that feels like i’m just chatting with a close friend.
Essential Preparation Steps: The Foundation of Flavor
Before you dive into any cooking, a little prep goes a long way. this is where mise en place comes into play—it's like a fancy chef term for “everything in its place.
” gather all your ingredients and equipment ahead of time. you’ll need your broasted fryer , mixing bowls, and some measuring spoons.
Trust me, it makes a world of difference!
Now, let’s talk time management . set a timer for your marinating chicken. you'll want it to soak in that buttermilk marinade for at least two hours , but overnight is even better.
Use this time to chill out or prep your sides—maybe some classic coleslaw or corn on the cob ?
Organization is key! keep your work area clean and your chicken separate from other ingredients. always remember, raw chicken can be a sneaky little troublemaker if not handled properly.
A quick note on safety considerations : always keep your cooking space free of any cross-contamination.
Step-by-Step Process: The Cooking Adventure
Let’s roll up those sleeves and get cooking! Here’s how to nail that broasted chicken recipe step by step:
-
Marinate the chicken : whisk together 1 cup of buttermilk , hot sauce (if you like it spicy), garlic powder, onion powder, salt, and pepper.
Submerge your chicken pieces into this mix and let it chill for at least two hours in the fridge.
-
Prepare Your Coating : In another bowl, mix all-purpose flour with paprika, baking powder, cayenne, salt, and pepper. This is your secret to that crispy chicken coating .
-
Heat the Fryer : Preheat your broasted fryer to 350° F ( 175° C) . This temperature is crucial for achieving that perfect crunch.
-
Coat and fry : shake off the excess marinade, then generously coat each piece of chicken with your flour mix.
Dust off the extra. place it in the fryer and cook for about 12- 15 minutes until golden brown.
Always check that the internal temperature hits 165° f ( 74° c) , because nobody wants undercooked chicken.
-
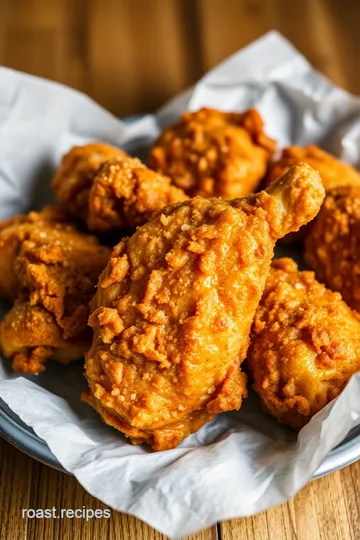
Drain and Serve : Place your golden pieces on paper towels to get rid of that extra oil. Serve them hot, and watch everyone rave about your juicy fried chicken.
Expert Techniques: Nailing It Like a Pro
Cooking isn’t just about following the recipe—it’s about the expert techniques that elevate your dish. Here are some nuggets of wisdom I’ve learned along the way:
-
Marinate Longer : If you can, soak your chicken overnight. The flavors penetrate deeper, and it results in a more delish juicy fried chicken .
-
Correct Oil Temperature : If the oil is too hot, you’ll get burnt chicken; too cold, and you’ll end up with a soggy mess. Use a thermometer if you have one—trust me!
-
Batch Frying : Don’t overcrowd the fryer! Give those chickens space to fry, or else you’ll have steamy, sad pieces instead of crispy wonders.
-
Visual Cues : Look for a nice golden-brown color. That’s your cue that your chicken is making its way to perfection.
Success Strategies: Ensuring You Shine
Now, let’s wrap this up with some success strategies to avoid common pitfalls. One of the biggest mistakes? Skipping the marinating step! You want that marinated chicken to shine.
Also, watch out for your frying times. If you overdo it, you’ll have dry chicken on your hands—yikes! Always trust your temperature checks and not just the clock.
Lastly, if you want to save time during a busy week, go for make-ahead options. marinate the chicken in advance and freeze it.
When you're ready to eat, just pop it in the fryer!
This is your complete guide to nailing that broasted chicken. It's not just about eating; it's about creating memories. So grab that recipe, dazzle your family, and enjoy every crunchy bite!
Additional Information
In the next section, we'll cover more recipes and tips to round out your kitchen game. Stay tuned for even more delicious inspiration!
Pro Tips & Secrets to Broasted Perfection
Let's get real for a second—everyone drools over crispy fried chicken , but getting that juicy fried chicken that's crispy and tender? a little bit of art and a whole lot of heart! here are my secret tips that i swear by when rocking that broasted fryer .
First off, marinate your chicken like you mean it ! i usually go for a buttermilk marinade that drives the flavor home.
Typically, i soak my chicken pieces overnight. yep, you heard me right. it’s like a spa day for your chicken, helping to lock in juiciness.
Trust me, you won’t regret this!
Now, onto the frying. to cut down on time but keep the flavor big, preheat that fryer to about 350° f .
This is the sweet spot! too hot, and you're just going to burn the coating; too cold, and you’ll get grease-sogged chicken.
Your guests will be like, “how is this chicken so darn good?”
Another little gem? if you want that crispy chicken coating , make sure to let the excess buttermilk drip off before coating it in seasoned flour.
A little extra shake doesn’t hurt, either! you want a good coating but not something that looks like it was dipped in cement.
Perfect Presentation: Make It Shine
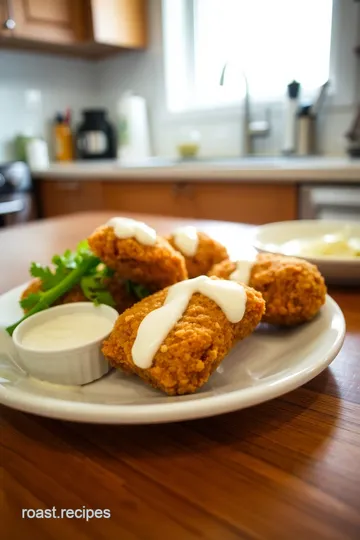
So, you've got your crispy broasted chicken ready, and it’s looking divine. Now let’s talk about making it shine on the plate. Remember, we eat with our eyes first!
For plating, my go-to method is to stack the pieces slightly on top of each other. it gives a cozy vibe.
Nothing screams comfort food like a nice little nest of chicken. sprinkling some fresh parsley or even a drizzle of honey on top can elevate the dish.
Color combinations are a big deal . for instance, a side of vibrant green coleslaw next to that golden-brown chicken? boom! just beautiful.
Don’t underestimate the power of a good garnish either; it’s like the cherry on top of your sundae. A sprinkle of paprika can add color and a little kick—highly recommend!
Storage & Make-Ahead: Savvy Cooking
Let’s be real, having leftovers is a lifesaver, especially after a busy day. if you have some extra easy broasted chicken , make sure to let it cool completely before sealing it in an airtight container.
I usually store mine in the fridge, and it’s good for about 3-4 days .
If you wanna keep it longer, you can freeze it, but, come on, who can resist leftovers for that long? seriously, i’ve learned the hard way that reheating on a skillet works wonders.
Throw it back on medium heat until hot but not dried out. this way, you’ll still enjoy that crispy texture !
Creative Variations: Shake It Up!
Feeling adventurous? There are tons of fun paths to wander down with this broasted chicken recipe . How about throwing in some spices? I love to spice it up with a bit of cayenne or even some chili powder for a spicy broasted chicken that makes your taste buds dance!
When it's summer, toss in some fresh herbs like basil or cilantro into your flour mixture. You’re essentially turning that classic chicken into an herb party!
Going gluten-free? Just substitute regular flour with gluten-free flour blend! It’s that easy! This way, everyone can join in on the crispy chicken joy.
Expert FAQ Solutions: Chicken Whisperer
You might have questions, and that's all good—let's tackle those! a common one is about doneness. what's the internal temperature for chicken ? grab a meat thermometer and aim for 165° f .
That’s the golden rule!
Some folks struggle with the frying process. If you're worried about uneven cooking, just fry in smaller batches. It may take a bit longer, but your chicken will thank you.
Finally, should you have any leftovers, will they taste just as good? absolutely! reheating the chicken properly can keep that flavor alive.
I promise you, with a little care, your broasted chicken remains iconic even the next day!
Conclusion: Get Frying!
Cooking is all about having fun, and there’s nothing quite like the satisfaction of pulling out a perfectly crispy, juicy, broasted chicken from the fryer—it's your delicious masterpiece.
So, grab your broasted fryer , gather the ingredients, and dive into this culinary adventure. your family (and taste buds) will thank you in the most delicious ways possible! go on, get crispy!
Crispy Broasted Chicken Card
⚖️ Ingredients:
- 1 cup (240 ml) buttermilk
- 1 tablespoon (15 g) hot sauce (optional)
- 1 teaspoon (5 g) garlic powder
- 1 teaspoon (5 g) onion powder
- 1 teaspoon (5 g) salt
- ½ teaspoon (2.5 g) black pepper
- 1 cup (120 g) all-purpose flour
- 1 teaspoon (5 g) paprika
- 1 teaspoon (5 g) baking powder
- ½ teaspoon (2.5 g) cayenne pepper (adjust to taste)
- 1 teaspoon (5 g) salt
- ½ teaspoon (2.5 g) black pepper
- 4-6 pieces of chicken (legs, thighs, or a combination, bone-in and skin-on)
- Oil for frying (refer to fryer manual for specifications)
🥄 Instructions:
- Step 1: In a mixing bowl, combine buttermilk, hot sauce, garlic powder, onion powder, salt, and pepper. Whisk until well-blended.
- Step 2: Submerge chicken pieces in the buttermilk mixture. Cover and refrigerate for at least 2 hours or overnight for best results.
- Step 3: In another bowl, mix flour, paprika, baking powder, cayenne, salt, and pepper. Whisk until thoroughly combined.
- Step 4: Remove chicken from marinade, shaking off excess. Dredge each piece in the flour mixture to coat thoroughly. Shake off any excess coating.
- Step 5: Follow manufacturer instructions to heat oil in the broasted fryer to 350°F (175°C).
- Step 6: Carefully place the coated chicken into the fryer. Fry for 12-15 minutes until golden brown and the internal temperature reaches 165°F (74°C).
- Step 7: Remove chicken and place on paper towels to drain excess oil. Serve hot, garnished as desired.
Previous Recipe: How to Make the Ultimate Everroast Chicken: Juicy & Delicious
Next Recipe: How to Make Sweet Onion Chicken Teriyaki: A Delicious Family Favorite