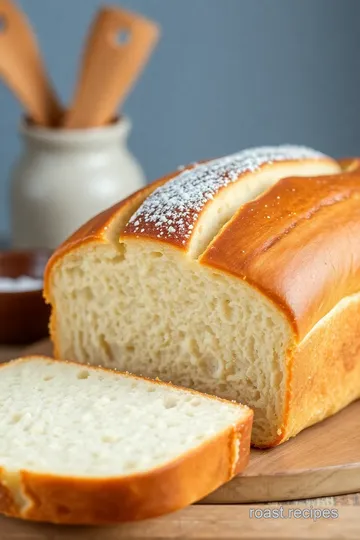
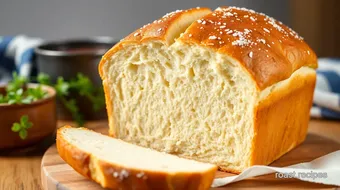
Soft & Golden Homemade Bread Loaf
Craving the best Bake Homemade Bread: Soft & Golden Loaf? Try my simple method for a warm, delicious loaf perfect for any meal! Get my tips inside!

- Introduction to Bake Homemade Bread: Soft & Golden Loaf
- Essential Ingredients Guide for Bake Homemade Bread: Soft & Golden Loaf
- Professional Cooking Method
- Pro Tips & Tricks to Bake Your Best Bread
- Perfect Presentation for Your Golden Loaf
- Storage & Make-Ahead Tips
- Creative Variations That Rock
- Complete Nutrition Guide
- Wrapping It Up
- Frequently Asked Questions
- Recipe Card
Introduction to Bake Homemade Bread: Soft & Golden Loaf
Have you ever walked into a kitchen, and the smell of freshly baked bread just hits you? it’s like a warm hug that wraps around you! i remember the first time i tried baking bread —it was a rainy saturday morning, and i thought, “why not?” spoiler: it was a total taste bud revelation ! let’s dive into this delightful journey where you’ll learn to bake homemade bread: soft & golden loaf .
Trust me, you’re going to love the process as much as the result.
Recipe Overview
Bread has been around forever. seriously! it dates back to ancient times when people ground grain and mixed it with water.
Fast forward to today, and there are endless variations—thank you, artisans ! in our fast-paced lives, though, the joy of baking at home has made a roaring comeback.
Everyone wants that golden crust bread that’s both comforting and satisfying.
Let’s get real for a second. this recipe isn't just a wild goose chase. it takes about 1 hour and 45 minutes in total—yup, you read that right! this includes prep and the all-important dough rising time.
The difficulty level? medium. you’ll need to follow some basic steps, but don’t panic! with a little love and attention, you’ll be a pro in no time.
And let’s talk about costs—making your own bread can save you some serious cash! a loaf in the store might cost you upwards of $4, but making this homemade bread recipe ends up being way cheaper.
Plus, you’re getting 12 delectable slices out of it!
Key Benefits
Now, i’ll be honest—who doesn’t love the taste of homemade bread ? but there’s more than just taste. did you know that when you bake bread yourself, you control the ingredients? this means you can dodge those questionable preservatives.
Want a whole wheat bread recipe ? you got it! how about going gluten-free? you can make your loaf that way too!
With each slice of this soft & golden loaf , you're packing in some nutrition, too. it’s a great source of carbohydrates , and if you sprinkle in some seeds or herbs, you’re also adding fiber! plus, the lovely aroma of baking bread fills your home and makes it the coziest place on earth.
Doesn’t that sound incredible?
This bread is perfect for all sorts of occasions! it’s not just a humble sidekick for your meals; it can be the star of some breakfast magic or fit right in with charcuterie boards during gatherings.
Wow your friends with this artisan delight, and let’s be honest, who doesn’t enjoy tearing into that freshly baked bread ?
Transition to Ingredients Section
Okay, my friends, i’ve spilled the beans on how awesome this recipe is and why it deserves a place in your kitchen.
Ready to roll up your sleeves? below are all the ingredients you’ll need to get that kitchen adventure started. let's get our hands in some flour and make that dough!

Essential Ingredients Guide for Bake Homemade Bread: Soft & Golden Loaf
Baking homemade bread is one of those skills that feels like pure magic. the smell wafting through your kitchen gets everyone excited.
It’s comforting, satisfying, and the finished product is nothing short of delicious. so before diving into the process of “ bake homemade bread: soft & golden loaf ,” let’s break down some essential ingredients that’ll take your bread game to the next level.
Premium Core Components
First things first, let’s talk measurements . you’ll want to grab 3 ½ cups (420g) of all-purpose flour, which is the backbone of your loaf.
Mix that with 1 tablespoon of active dry yeast. trust me, this yeast is the secret to that soft bread texture we all crave.
When choosing flour, look for ones that are finely milled. you want that quality to ensure a fluffy loaf . for sugar, the 1 tablespoon isn’t just for sweetness; it’s essential for feeding the yeast during the yeast activation process .
Keep an eye on your ingredients’ freshness; expired yeast can ruin your dough speed.
Now, let’s get into storage . store your flour in a cool, dry place in an airtight container. it should last about 6-8 months .
Yeast? if you’re using it from a bulk container, keep it in the fridge for maximum lifespan – about 4 months .
Signature Seasoning Blend
Bread isn’t just about flour and yeast. salt is vital; a teaspoon gives flavor and controls fermentation. feel adventurous? you could toss in some herbs for a twist! rosemary or thyme pairs beautifully in a loaf and adds that little something extra.
While you’re at it, don’t forget about your favorite spices . adding garlic powder or onion powder can elevate your bread into something truly special.
If you’re in the mood for experimentation, explore your local spice aisle. Some regions have unique spice blends that could be fun to add, depending on what vibe you're going for.
Smart Substitutions
Now, let's say you’re out of all-purpose flour; no sweat! you can totally use bread flour for a chewier texture, or even try a whole wheat bread recipe if you’re feeling extra healthy.
For a gluten-free option, consider almond or oat flour. just keep in mind that it might need a few adjustments in terms of liquid or binding agents.
What about when the yeast decides to go on strike? if you can’t activate it, opt for a no-knead bread method using baking powder instead.
Just give your dough extra rising time and you’re golden.
Kitchen Equipment Essentials
Okay, let’s chat tools. you’ll need a large mixing bowl and something for mixing – a wooden spoon works fine, or you might go fancy with a stand mixer.
When your dough is ready, a 9x5 inch loaf pan is your best friend.
Don’t underestimate the power of a kitchen thermometer for checking that perfect baking temperature. for bread, you want that internal temp to reach 190° f .
Your loaf will come out golden and beautiful if you time it right.
Serving Up Success
After following these steps and using your baking equipment essentials , there’s nothing left to do but slice into your bread.
The golden crust bread that you’ve created deserves to be served warm, right out of the oven, dripping with butter.
Honestly, is there anything better?
Get ready to impress your friends and family. The aroma of freshly baked bread? It’s irresistible, and you’ll love every moment of it.
So, that’s the lowdown on essential ingredients and insights for our recipe to bake homemade bread: soft & golden loaf .
Now, let’s get into the juicy step-by-step instructions to make that loaf a reality!

Professional Cooking Method
When it comes to baking homemade bread, especially something as classic as a soft & golden loaf , mastering the professional cooking method can take your baking game to the next level.
Trust me, it’s worth it—imagine that freshly baked bread aroma swirling through your kitchen! today, i’ll share my journey, and you’ll pick up some handy tips and tricks along the way.
Essential Preparation Steps
First things first, let's talk about mise en place . this fancy french term just means having everything prepped and organized before you start cooking.
For our bread, gather your ingredients: flour, yeast, water, and salt. it's like setting the stage before the show. having everything ready will save you time and prevent those “oops, where’s the sugar?” moments.
Time management is key too. while your dough is proofing , you can clean your kitchen or prepare any mixing bowls you'll need.
Keep a timer handy—trust me, nothing’s worse than realizing your dough has been sitting too long.
Organization strategies are pretty simple: keep your workspace clutter-free and all your handy tools within arm's reach. and don’t skip on safety considerations .
Hot oven, sharp knives—let’s stay safe, folks. always keep a kitchen towel by you to quickly wipe your hands or handle a hot pan.
Step-by-Step Process
Here’s a quick rundown on making that Soft & Golden Loaf :
-
Activate yeast: toss your 1 tablespoon of sugar into 1 ½ cups of warm water (about 110° f) and mix in 1 tablespoon of active dry yeast .
Let it rest for about 5- 10 minutes until foamy.
-
Make dough: in a large bowl, combine 3 ½ cups of flour and 1 teaspoon of salt . don’t forget the melted butter.
Then stir your yeast mixture until it becomes a shaggy dough.
-
Knead dough: this part can get fun and messy. knead for about 8- 10 minutes until that dough becomes smooth and elastic.
Feel free to use a stand mixer with a dough hook if you’d rather not workout your arms, but kneading is kinda therapeutic!
-
First Rise: Plop your dough into a greased bowl and cover it with a towel. Let it rise in a warm spot for 1 hour or until doubled in size .
-
Shape loaf: punch down the dough—literally! grab it, shape it into a loaf, and place it in a greased 9x5 inch loaf pan .
This can be fun; just don’t get too rough or you’ll lose all those lovely air bubbles you've created.
-
Second Rise: Cover and let it rise for another 30 minutes . This is where the magic happens!
-
Preheat Oven: As you wait, turn that oven to 375° F .
-
Bake: pop your beautiful shaped loaf into the oven for 30 minutes . you want it to be golden brown, and the inside temperature should hit 190° f for that perfect texture.
-
Cool: Let it cool in the pan for 10 minutes , then move it to a wire rack to cool completely. Try not to slice it right away; let that crust settle.
Expert Techniques
Now that we've tackled the basics, let's chat about some expert techniques . one of the critical steps is making sure your yeast is active before mixing it in.
If it doesn’t foam, toss it; your dough will thank you later.
As for quality checkpoints , use a kitchen thermometer. You want that internal temperature to be spot on!
Common hurdles? Over-kneading can lead to dense bread, while under-kneading makes for a flat loaf. So trust your hands and feel that dough.
Success Strategies
Let’s avoid those rookie mistakes. first, check your baking equipment essentials —a good loaf pan is crucial. if you're trying out different flours, keep in mind that each has unique dough rising times .
For a soft crust, cover your loaf with a towel while cooling. and if you want to prep ahead, the dough can be frozen after its first rise.
You can save yourself some time for later!
In the end, baking really is a labor of love, and when you finally achieve that golden crust bread , the sense of accomplishment is oh-so-sweet.
Stay tuned for more delicious tips and tricks in our next section: Additional Information.
Pro Tips & Tricks to Bake Your Best Bread
Let’s dive into the nitty-gritty of baking homemade bread, focusing on some pro tips and secrets that’ll elevate your skills and confidence in the kitchen.
Here’s the scoop from my adventures, because, oh boy, you know i’ve made my share of mistakes!
Crafting the dough:
when you're starting out, remember to give your yeast a little love! activate it with warm water, not scalding hot — think bathwater for your baby , not the steam room.
If it doesn’t foam after 10 minutes, your yeast might be doa. no worries, though; this is how you learn!
Time-savers and boosters:
say goodbye to those marathon kitchen sessions! use a no-knead bread method if you're in a jam.
Just mix, let it be, and walk away. trust me, you’ll achieve those glorious textures with less work down the road.
Flavor enhancement:
try adding flashy ingredients like herbs and spices . a tablespoon of rosemary or garlic powder can make your loaf sing! it’s like putting icing on your favorite dessert; it just makes everything better.
Perfect Presentation for Your Golden Loaf
Now, let’s talk about how to make your golden crust bread look as good as it tastes. We all eat with our eyes first, right?
Plating techniques:
after baking, let that loaf cool down before slicing. this helps preserve that soft bread texture . when it’s time to serve, slice it up and arrange pieces diagonally on a cutting board or a rustic platter.
Looks fancy, right?
Garnish ideas:
throw in a sprig of fresh parsley or some cherry tomatoes for a splash of color on the side — it’s like dressing your bread up for a party.
You could even drizzle a bit of olive oil for that touch of class.
Storage & Make-Ahead Tips
Now, let’s get down to the brass tacks of keeping your homemade bread fresh longer.
Storage guidelines:
wrap your cooled loaf in a kitchen towel and then slip it into a paper bag. this helps keep it crusty.
Avoid plastic bags unless you want a soggy mess. you can also freeze the loaf by wrapping it tightly in foil; it lasts a good 3 months .
When you’re ready, just pop it in a preheated oven for about 10- 15 minutes to revive that golden crust.
Reheating Instructions:
For best results, use a kitchen thermometer for bread when you reheat. You want that internal temp back up to 190° F for maximum fluffiness.
Creative Variations That Rock
Now, let’s get creative! There’s so much you can do with your yeast bread recipes .
Flavor adaptations:
feeling adventurous? mix in some sun-dried tomatoes or olives for a mediterranean twist. swap in a whole wheat bread recipe for something heartier or even try a gluten-free bread option using almond or coconut flour.
Seasonal Twists:
Consider adding pumpkin spice in fall or cranberries in the winter months. The flavors will remind you of cozy holidays and homemade goodness.
Complete Nutrition Guide
Baking isn’t just art; it’s also science, my friend. Here’s a quick lowdown on the nutritional values of homemade bread .
- Calories per slice: About 120 .
- Plenty of fiber if you go whole grain!
- When considering portion sizes, remember: one loaf gives you about 12 slices . Perfect for sharing or hoarding for yourself.
Baking isn’t just about making something delicious; it’s about the joy of the process. you’ll learn a ton as you go, from proofing dough to figuring out your loaf pan size recommendations .
Wrapping It Up
So, when you’re ready to bake homemade bread: soft & golden loaf , keep these pointers in mind. embrace the mess, roll with the punches, and before you know it, you’ll be the proud owner of a perfect loaf with a killer crust and a pillow-soft inside.
And trust me, nothing beats that freshly baked bread aroma wafting through your kitchen and your heart, right? happy baking!
Frequently Asked Questions
How can I ensure my bread is soft when I bake homemade bread: Soft & Golden Loaf?
To achieve a soft texture, make sure not to over-knead the dough. After kneading, allow the bread to rise until it has doubled in size, which builds the gluten and gives the loaf its structure. Additionally, cover the loaf with a towel while it cools; this traps moisture and keeps the crust soft.
What can I use if I don’t have all-purpose flour for the Soft & Golden Loaf?
If you don’t have all-purpose flour on hand, bread flour is a great substitute as it has a higher protein content, resulting in a chewier texture. You can also experiment with whole wheat flour, but keep in mind you may need to adjust the liquid quantity due to different absorption rates.
How do I store leftover homemade bread to keep it fresh?
To store your leftover Soft & Golden Loaf, wrap it tightly in plastic wrap or aluminum foil once it has cooled completely. Keep it at room temperature for up to 3 days. For longer storage, consider slicing and freezing the bread in a resealable bag; it will retain its quality for up to three months.
Can I add ingredients like herbs or cheese to the Soft & Golden Loaf recipe?
Yes, you can definitely customize your bread! Adding herbs like rosemary or mixing in cheese such as cheddar can enhance flavor and make it unique. Just fold these additions in during the final mixing stage after you’ve formed the dough.
Why is my bread not rising properly when I bake homemade bread: Soft & Golden Loaf?
There could be several reasons for insufficient rising. Firstly, check if your yeast is fresh and active by ensuring it foams when mixed with warm water and sugar. Also, make sure the dough is kept in a warm, draft-free area during the rising time, as cooler temperatures can slow down yeast activity.
What is the best way to know when my Soft & Golden Loaf is done baking?
The best way to determine if your loaf is done is to check its internal temperature with an instant-read thermometer; it should read 190°F (88°C). Additionally, the bread should have a golden-brown crust and produce a hollow sound when tapped on the bottom.
Soft & Golden Homemade Bread Loaf Card
⚖️ Ingredients:
- 3 ½ cups all-purpose flour (420g)
- 1 tablespoon active dry yeast
- 1 tablespoon sugar
- 1 teaspoon salt
- 1 tablespoon unsalted butter, melted (plus extra for greasing)
- 1 ½ cups warm water (110°F/43°C or slightly warmer)
- Additional flour for dusting
- Optional: 1 egg, beaten (for egg wash)
🥄 Instructions:
- Step 1: Combine warm water, sugar, and yeast in a bowl. Let it sit for 5-10 minutes until foamy.
- Step 2: In a large bowl, whisk together flour and salt. Add the yeast mixture and melted butter. Mix until a shaggy dough forms.
- Step 3: Turn the dough onto a floured surface and knead for 8-10 minutes until smooth and elastic. Alternatively, use a stand mixer with a dough hook for 5-7 minutes.
- Step 4: Place dough in a greased bowl, cover with a towel, and let rise in a warm area for 1 hour, or until doubled in size.
- Step 5: Punch down dough to release air. Remove dough from the bowl, shape into a loaf, and place it in a greased loaf pan.
- Step 6: Cover with a towel and let rise again for 30 minutes.
- Step 7: During the second rise, preheat the oven to 375°F (190°C).
- Step 8: Optionally brush the top with beaten egg for color. Bake for 30 minutes or until golden brown and the internal temperature reaches 190°F (88°C).
- Step 9: Remove from the oven and let the loaf cool in the pan for 10 minutes. Transfer to a wire rack to cool completely.
Previous Recipe: Easy & Juicy Bake Turkey Meatloaf with Tangy Glaze: My Family Favorite
Next Recipe: Easy Family-Style Crockpot Lasagna with Creamy Cheese Layers: A Cozy Classic